IBackup Express
- Why should I use the 'IBackup Express' service?
- I have several hundred gigabytes of data. How would I back this up online fast without using up my Internet bandwidth?
- How soon can I expect to see my data online once I ship the drive?
- My computer has crashed. Can I get the data in my account shipped to me?
- How soon can I expect my data to be shipped back to me?
- How does IBackup Express secure my data?
- Is it possible to backup from multiple computers?
- Can I backup my open files?
- Can I backup or restore my servers and databases using IBackup Express™?
- My backed up data is not being displayed under the Restore tab. What should I do?
- How do I backup my Time Machine?
- How does IBackup Express handle symbolic links on my Mac?
Why should I use the 'IBackup Express' service?
IBackup Express allows for quick backup and retrieval of data via a temporary storage device. The service is FREE for Backups, and Restores are charged at $99.50 per request. The IBackup Express service includes return shipping and is available only in the USA.
Benefits
- The temporary storage device is shipped to your location, thus the load on bandwidth at your end is greatly alleviated.
- This service enables you to quickly transfer data large amounts of data, often in just a week or under.
- Your data will be stored encrypted with an optional private key throughout the process.
I have several hundred gigabytes of data. How would I back this up online fast without using up my Internet bandwidth?
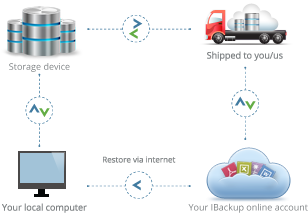
Backing up data of several GBs can be done online, but may take several days, often weeks. Use the IBackup Express service to physically transfer large amounts of data to our servers, without impacting your bandwidth consumption.
IBackup Express provides an efficient means to establish swift online backups for data sets with sizes 1000 GB and higher. External hard drives are an ideal solution for data sizes of up to 2 TB. For larger data sizes, NAS devices are provided.
Steps for Backup
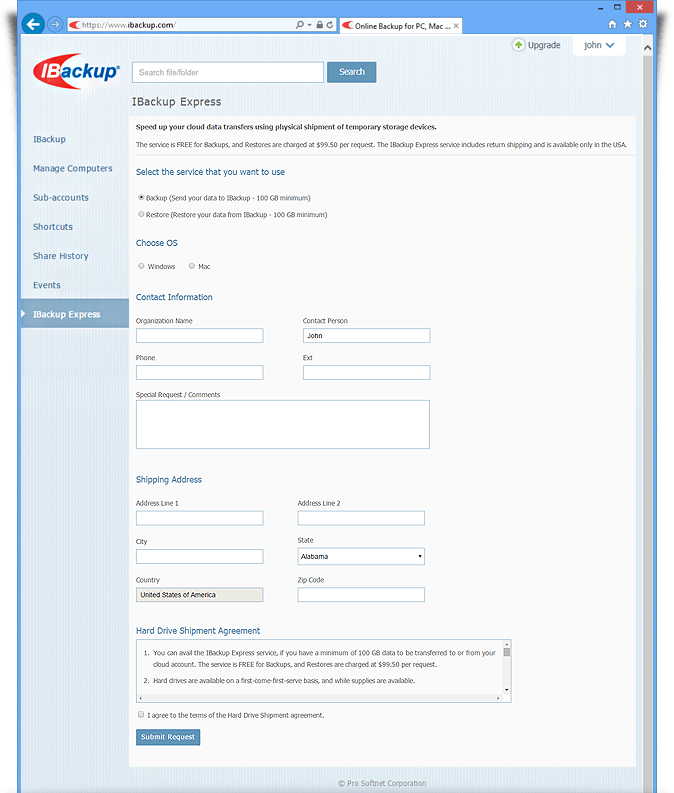
- Fill in the hard drive shipment form available at https://www.ibackup.com/newibackup/login/loginForm?from=hard_drive.
- Once, you receive the temporary storage device, connect it to your computer and launch the IBackup application.
- From the ‘Backup’ tab, select the ‘Backup files to my local / Wi-Fi device’ radio button.
- Select the temporary storage device as the ‘Backup location on your local drive’ and perform local backup for the data to be transferred.
Note: If files are already present in your online backup account and those same files are also sent via IBackup Express, the backup files in your account will be maintained to avoid any conflicts. We recommend you to delete or purge existing data from your online backup account to upload duplicate files from Express device.
- Ship the storage device back to IBackup. We will upload the data to your IBackup account.
Once the data is transferred from the device to your IBackup online account, you can continue incremental backups through the conventional online backup process.
Note: You will be responsible for arranging shipping, handling, tracking and insuring the storage device back to IBackup. IBackup assumes no liability for a lost or damaged drive or for loss or breach of data during the return shipment process. You acknowledge that if you don't use the current version of IBackup Express application to backup your data to the drive, it is possible that the data is possibly stored unencrypted on the storage device and that no sensitive data is included.
How soon can I expect to see my data online once I ship the drive?
Once, we receive the storage device with your data, it typically takes 2 to 5 business days to transfer the data to your online account. Occasionally, it may take longer than 10 days due to high volume.
My computer has crashed. Can I get the data in my account shipped to me?
Yes, using IBackup Express service, you can get your backed up data shipped to you.
- Fill in the hard drive shipment form available at https://www.ibackup.com/newibackup/login/loginForm?from=hard_drive.
- Email us at support@ibackup.com with the subject line clearly indicating your IBackup username. The body of the email must contain details of your request particulars to enable IBackup to assist you.
- You will receive a confirmation from us stating that IBackup has received your request. Your data will be retrieved from our servers onto a temporary storage device, and shipped to you. We will keep you updated with the progress details.
- After you receive the device, plug it into your computer via the USB cable and launch the IBackup application.
- Select the Express device as the ‘Backup location on your local drive’.
- Go to the ‘Restore’ tab, from the ‘Select files / folders for restore’ drop-down menu, choose the Express device.
- Select the files and folders to restore to your system and click Restore Now.
How soon can I expect my data to be shipped back to me?
Once your request has been received, it will take around 2 to 5 business days for data to be transferred to a temporary storage device and shipped to you. Delays may arise due to unforeseen issues with courier/shipping etc. IBackup takes no responsibility for such delays.
Note:The Express Restore services are charged at $99.50 per request.
How does IBackup Express secure my data?
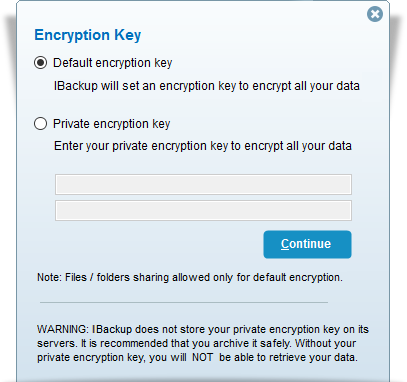
IBackup Express uses industry standard 256-bit AES encryption with an optional private key. Your data is safe throughout the process as it is stored encrypted in the temporary storage device during transit.
WARNING: It is recommended that you archive your private encryption key safely to backup and restore your data. However, if you opt for the default encryption key, you need not remember it.
Is it possible to backup from multiple computers?
Yes, you can use IBackup Express to backup data from multiple computers. IBackup Express creates a unique folder with the name of the computer under the default backup location, to backup data. This prevents data overlap during multiple computers backup.
IBackup is capable of backing up open files for supported platforms including Windows XP, Windows Vista, Windows 7, Windows 2008 server and Windows 2003 servers. It is enabled by default.
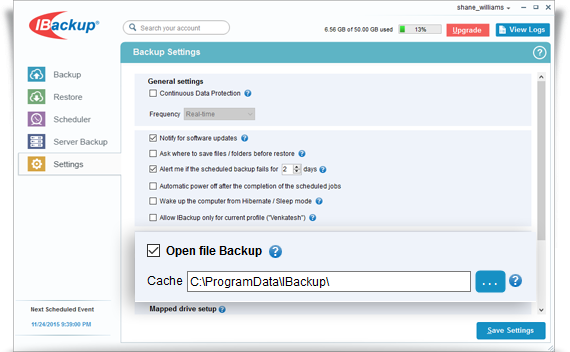
Even if your Microsoft Outlook application is open, the IBackup application does a reliable local backup of associated data. Similarly, your Quickbooks/Quicken and other possible open files are backed up as well.
Can I backup or restore my servers and databases using IBackup Express™?
Yes, you can backup or restore MS SQL Server, MS Exchange Server, MS SharePoint Server, Oracle Server, System State data, and servers running on Hyper-V environment, using the IBackup Express service.
On request, IBackup sends you a hard drive of up to 3 TB in size. Using the IBackup application, you can perform Local Backup for your database and server files to the hard drive and ship it to your cloud account, or you can directly restore the files sent from your cloud account to your servers and databases.
Note : Currently, Local Backup in IBackup does not support data encryption for servers and databases.
My backed up data is not being displayed under the Restore tab. What should I do?
For the files to appear under the 'Restore' tab, ensure that you have chosen the appropriate drive in 'Backup location on your local drive' under the 'Backup' tab. Next ensure that the same drive appears in the 'Select files / folders for restore' field under the 'Restore' tab and click ![]() . All the files backed up to your Express device will appear.
. All the files backed up to your Express device will appear.
Also, due to unforeseen events on your computer and application usage over a period of time data may not be displayed. In order to resolve this issue, use the re-indexing feature.
Under Restore tab, right-click 'My Device' and select 'Re-index Express data'.
How do I backup my Time Machine?
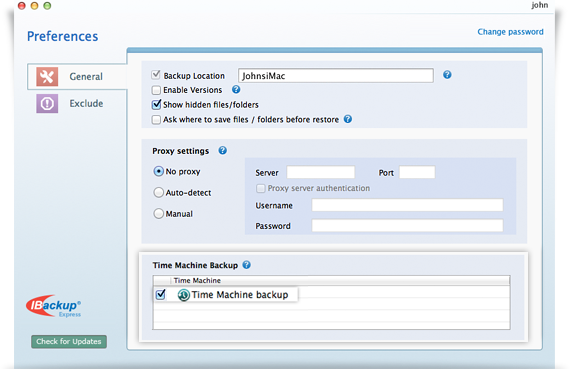
IBackup Express can be used to backup the Time Machine data of your Mac. This is to provide an additional protection to your Mac, including system files, applications, accounts, preferences, music, photos, movies, and documents.
To set Time Machine Backup,
- Click the 'IBackup Express status iItem'.
- Select 'Preferences' > 'General'.
- Enable 'Time Machine backup’ by using the check box.
